IDE
Download
- Download Virtual Box.
- Download Vagrant.
- Download Putty.
- Download SuperPutty.
- Download Kubernetes Starter Kit.
Run Kubernetes
- Open
~\_Lecture_k8s_starter.kit-main\ch1\1.2\k8s-min-5GiBoncommend - Enter
vagrant up

- Open Virtual Box to check 4 machines

Run Kubernetes on Terminal
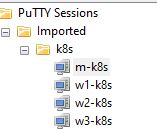
- Open SuperPutty - [File] - [Import Sessions] - Import
~\_Lecture_k8s_starter.kit-main\ch1\1.3\Sessions.Xml
Setting
- To easy exit from the virtual machine, Open Virtual Box - [Environment Settings] - [Input] - [Virtual Machine] - Click Host Key and Press Ctrl + Alt
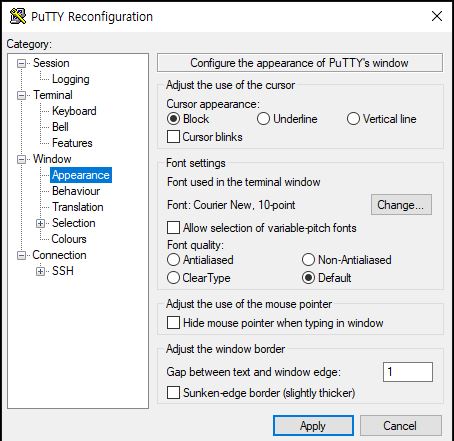
- To change font size of SuperPutty, Open SuperPutty and Click m-k8s from Sessions - Right click the session name in Commands - [Change Settings] - [Window] - [Apperance]
- If you want to change Putty colour, copy and paste
_puttycolor.jsandk8s(github_SysNet4Admin) Terminal,regin~\_Lecture_k8s_starter.kit-main\ch8\012to your putty folder.
Pod
- Pod is union of containers.
- One pod has one or several containers to do one specific work.
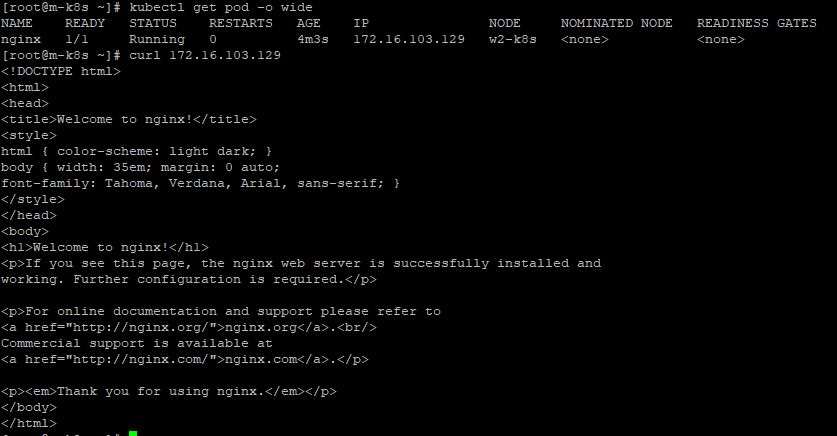
Release Pod with NGINX
- Enter
kubectl run nginx --image=nginx - Enter
Kubectl get podand wait until Status is changed to Running - Enter
Kubectl get pod -o wodeand copy nginx IP - Enter
curl [nginx IP]
Connect Pod from Outside
Service
- We use a service to connect a pod from Outside.
- At first, service will be connected with a NodePort.
- Then the NodePort communicates with the node.
- As a result, the service finds the pod in the node.
Expose Service
- Enter
kubectl expose pod nginx --type=NodePort --port=80to expose a service with a port. - Enter
kubectl get serviceand check your port number.

- Enter
kubectl get nodes -o wideand check INTERNAL-IP.

- Check one of IP is connected from outside like commands or web browser.

Deployment
- Union of Pods
Create Deployment
- Enter
kubectl create deployment deploy-nginx --image=nginx.
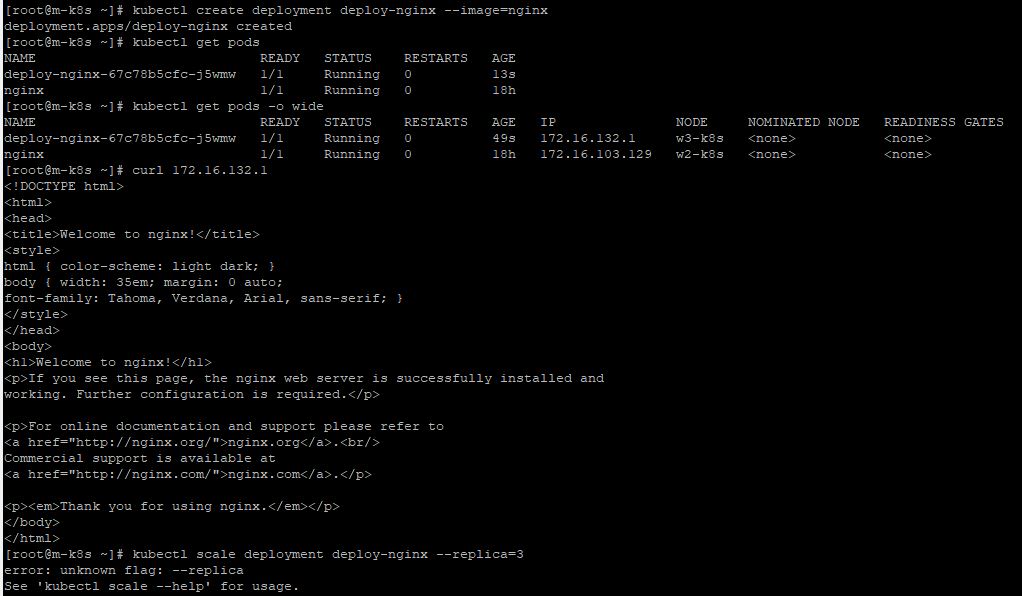
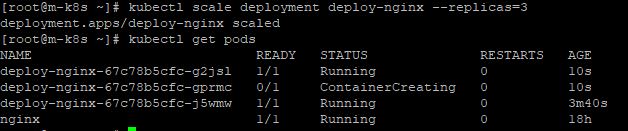
Scale Deployment
- Enter
kubectl scale deployment deploy-nginx --replicas=3because default replicas set is 1.
Expose Deployment
- This way is not the best way to connect with pods because you have to share your Internal IP.
- Enter
kubectl expose deployment deploy-nginx --type=NodePort --port=80.

Load Balancer
- We use Load Balancer to expose the Deployment with External IP.
- Enter
kubectl apply -f ~/_Lecture_k8s_starter.kit/ch2/2.4/metallb.yamlto install MetaLib.

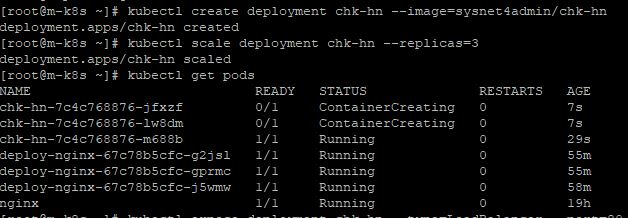
- Enter
kubectl create deployment chk-hn --image=sysnet4admin/chk-hn. - Enter
kubectl scale deployment chk-hn --replicas=3.
- Enter
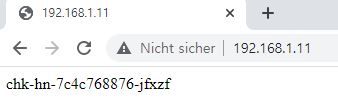
kubectl expose deployment chk-hn --type=LoadBalancer --port=80.
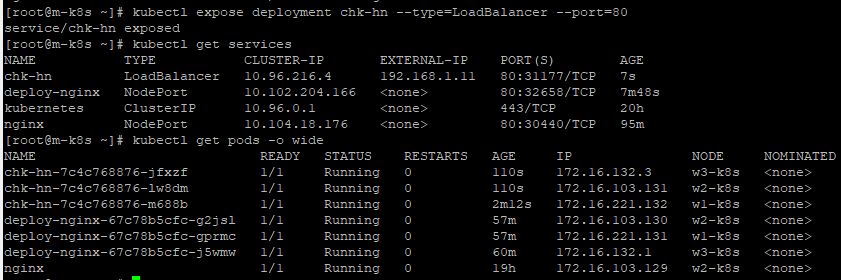
- Check your External IP with web browser
Delete Deployment, Service, Pod and MetaLib
- Enter
kubectl delete deployment [Your Deployment Name].

- Enter
kubectl delete service [Your Service Name].

- Enter
kubectl delete Pod [Your Pod Name].

- Enter
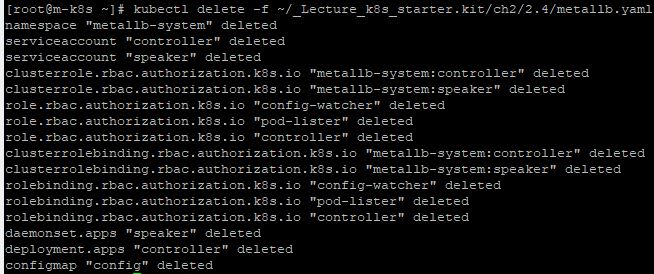
kubectl delete -f ~/_Lecture_k8s_starter.kit/ch2/2.4/metallb.yaml.
Components
Native components
- Enter
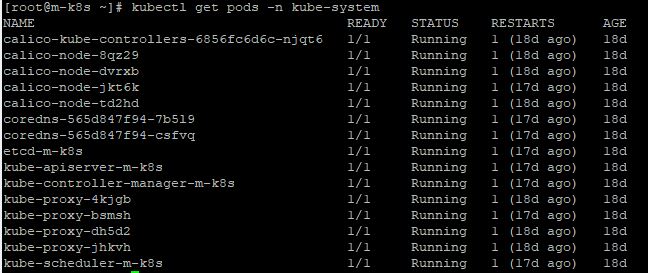
kubectl get pods -n kube-system.
Kubernetes Cloud Service
- EKS : Elastic Kubernetes Service from AWS
- AKS : Azure Kubernetes Service
- GKE : Google Kubernetes Engine
Issues
About Deleteing
- If your deleted pod was a real pod, then you cannot rewind.
- But if your deleted pod was in a deployment, then kubernetes rewind the pod automatically.
- If you delete a pod in mater node, kubernetes recreate it automatically.
Pods
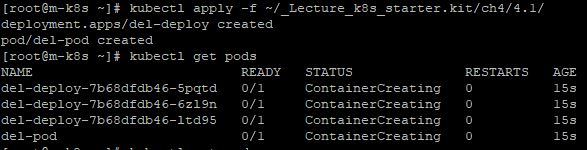
- At first, you have to make pods and a deployment for practice with
kubectl apply -f ~/_Lecture_k8s_starter.kit/ch4/4.1/. - Now, you have 3 deployment’s pods and 1 just pod.
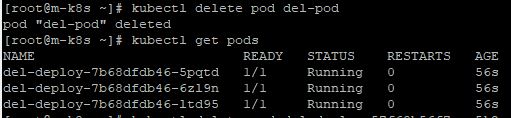
- When you delete del-pod with
kubectl delete pod [Your Pod], three pods will be remained. - And del-pod is removed eternally.
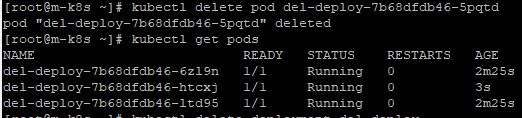
- When you delete a pod which is in the deployment with
kubectl delete pod [Your Delpoyment's Pod], three pods will be remained. - Your deployment will rewind your deleted pod automatically.
Deployment
- When you want to delete a pod which is in the deployment, enter
kubectl delete deployment [Your Deployment]. - Your deployment will remove your all pods in that deployment.

Scheduler
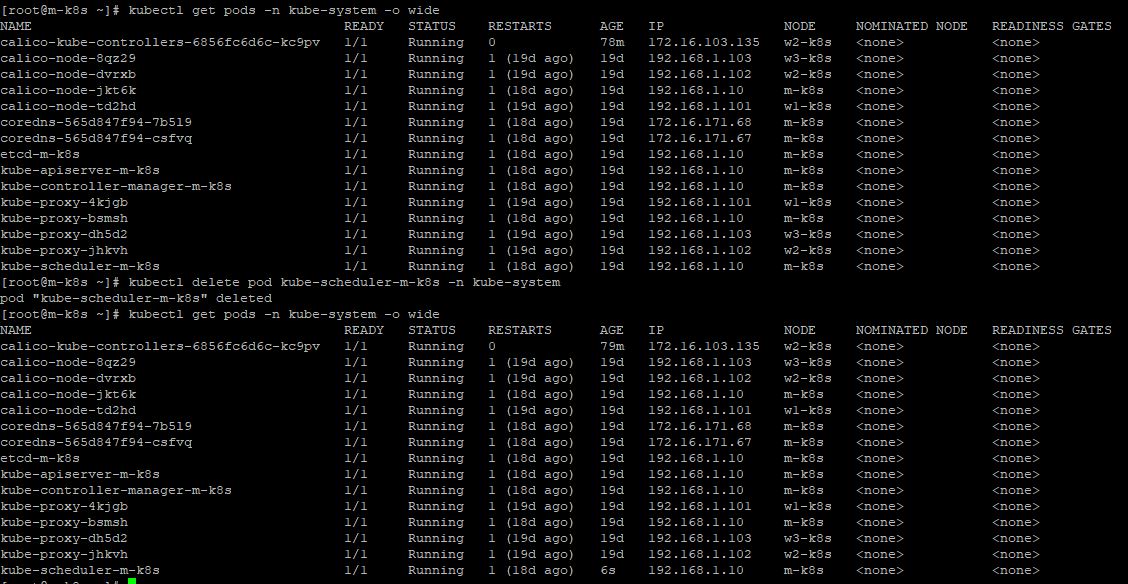
- To delete Scheduler in master node, enter
kubectl delete pod kube-scheduler-m-k8s -n kube-system. - Then you can see that your kubernetes create new scheduler immediately.
About Termination
- If you terminate a worker node, kubernetes seperate pods in that worker node to others.
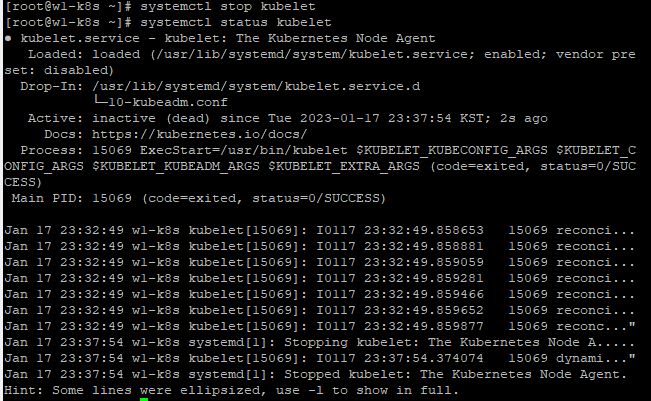
Kubelet
- At first, terminate first worker node with
systemctl stop kubelet
- You have to make pods for practice with
kubectl apply -f ~/_Lecture_k8s_starter.kit/ch4/4.1/del-deploy.yaml. - Now, you have 3 deployment’s pods unfairly.

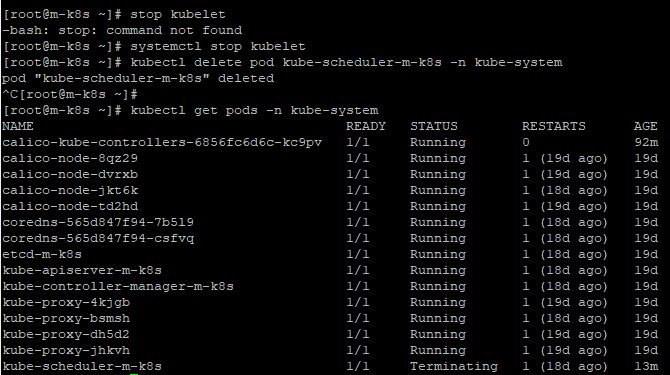
- In master node, you can also practice terminating Kubelet with
systemctl stop kubeletandkubectl delete pod kube-scheduler-m-k8s -n kube-system - Now your scheduler in master node is always Terminating, because your master node kubelet is stopped.
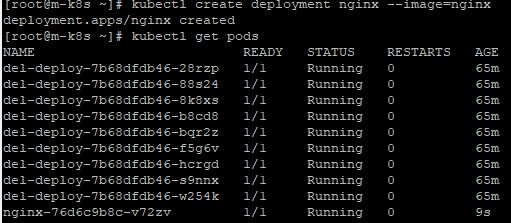
- You can check, that kubelet in master node is still working well, with
kubectl create deployment nginx --image=nginx
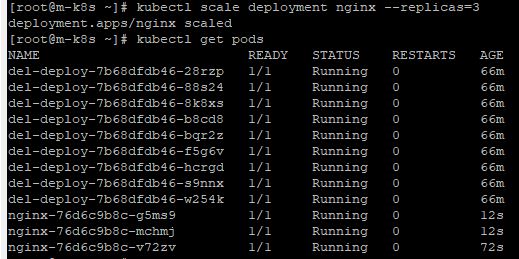
- You can check, that scheduler in master node is still working well, with
kubectl scale deployment nginx --replicas=3
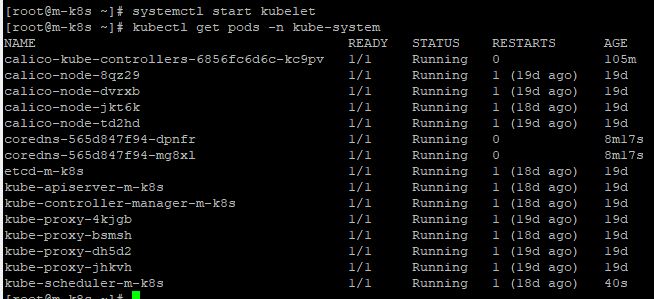
- By the way, to restart our kubelet and scheduler, enter
systemctl start kubelet
ContainerD
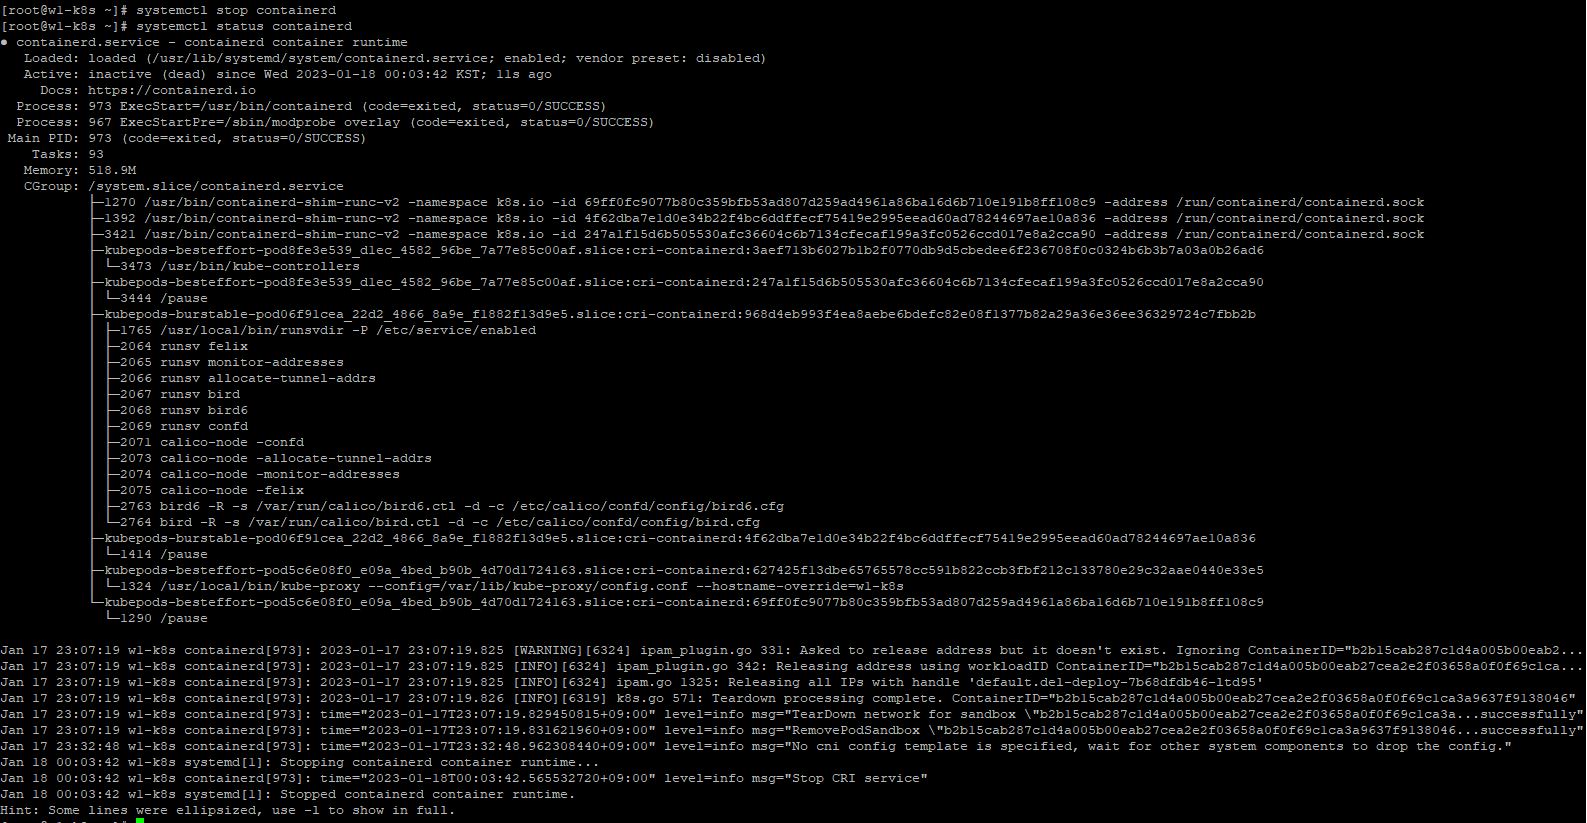
- At first, terminate containerD in first worker node with
systemctl stop containerd
- You need to scale pods to 6 with
kubectl scale deployment del-deploy --replicas=6. - Now, you have 6 deployment’s pods and those pods are working in worker node 2 and 3, not 1.

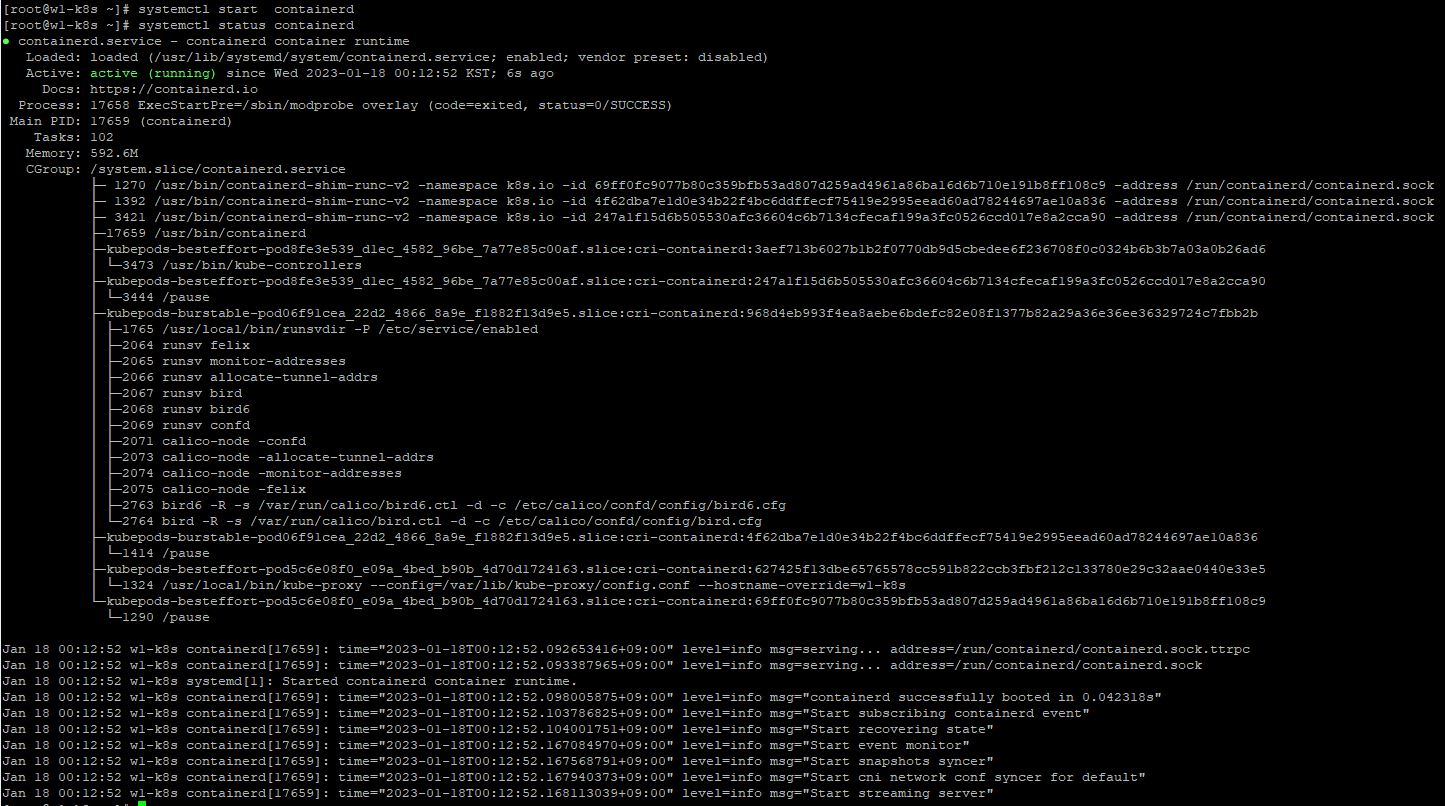
- To restart containerD, enter
systemctl start containerd.
- You have to rescale to see the worker node 1 in pod list with
kubectl scale deployment del-deploy --replicas=9.

- In master node, you can also practice terminating ContainerD with
systemctl stop containerd

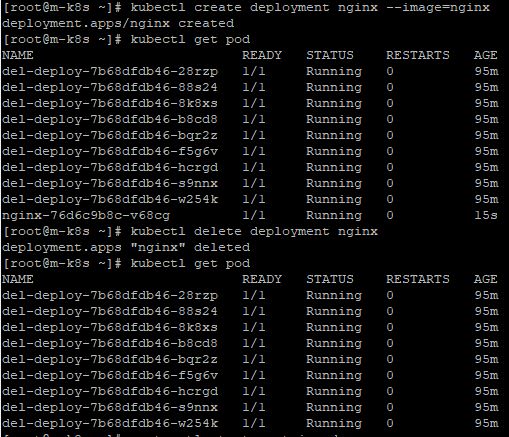
- You can check, that ContainerD in master node is still working well, with
kubectl create deployment nginx --image=nginxandkubectl delete deployment nginx
- By the way, to restart our ContainerD and scheduler, enter
systemctl start containerdand

Docker
- In worker node #1, you will stop ContainerD and Docker with
systemctl stop containerdandsystemctl stop docker. - Then your new scaled deployment is not working in worker node #1.

- When you stoped worker node #1 more than 5 minutes, your pods in worker node #1 are terminated.
- But, those are not deleted, because there is no ContainerD.

Object
- Most objects in kubernetes has the status and spec.
- Pod : union of container
- Service : Connection Pod with outside
- Namespace : Place to publish pods, services and delpoyments
- Volume : Place to save eternal data, like pod
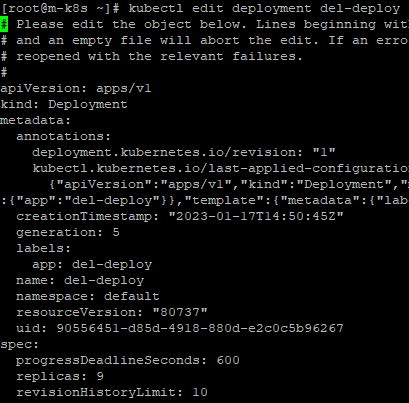
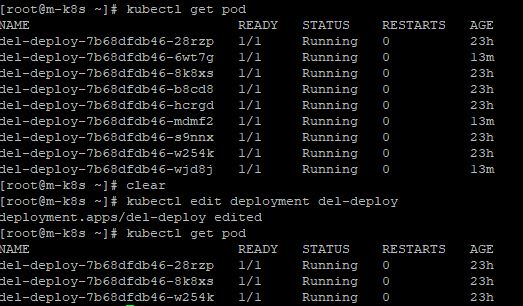
Edit Status
- To edit status of deployment, enter
kubectl edit deployment del-deploy
Apply Volume
- At first, create symlink to make log file about volume with
~/_Lecture_k8s_starter.kit/ch5/5.2/nfs-exporter.sh log,cat /etc/exportsandcat ~/_Lecture_k8s_starter.kit/ch5/5.2/dpy-chk-log.yaml.
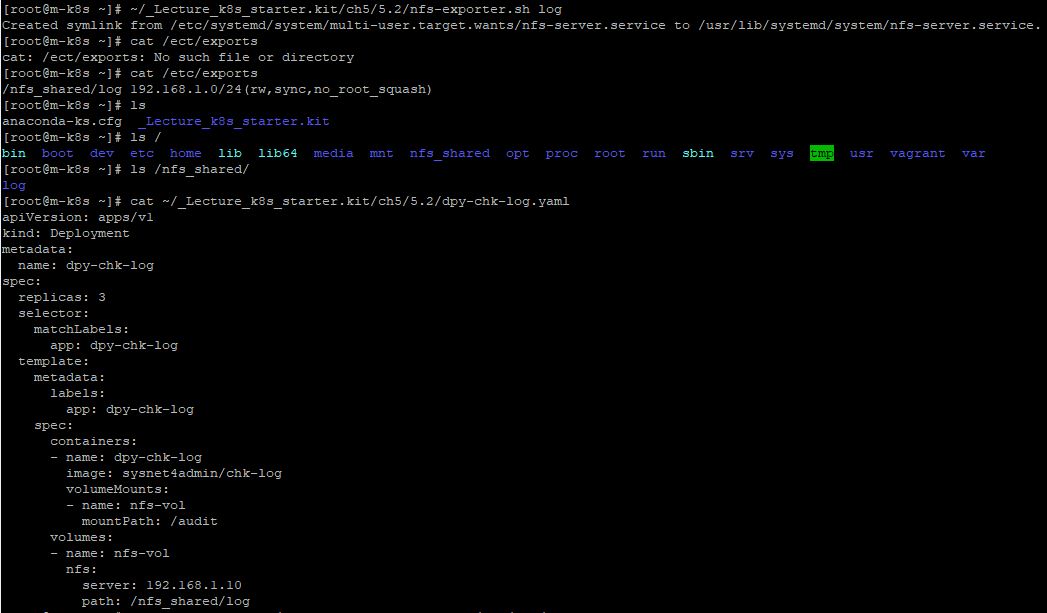
- Now, create deployments with
kubectl apply -f ~/_Lecture_k8s_starter.kit/ch5/5.2/dpy-chk-log.yaml.
- Now, create deployments with
kubectl apply -f ~/_Lecture_k8s_starter.kit/ch5/5.2/dpy-chk-log.yaml.

- To check your log file, first of all, you have to execute a deployment with
curl [Your Deployment IP]. - Then you will access this deployment with
kubectl exec dpy-chk-log-655668ffb8-jl9fr -it -- /bin/bash. - And you can access the log file with
cat audit/audit_dpy-chk-log-655668ffb8-jl9fr.log. - You can see your execution after that command line.
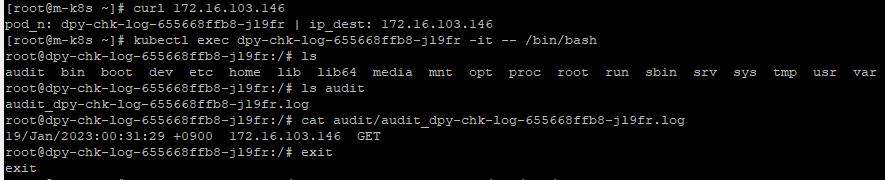
- This log file data is eternally saved, even when we deleted deployments.
Short Cut
| Object | Short cut |
|---|---|
| Pod | po |
| Deployment | deploy |
| Node | no |
| Namespace | ns |
| Service | svc |
Alias
- With alias, we can make short cut in kubernetes.
Master Node
- You can see all line of master node code with
cat ~/_Lecture_k8s_starter.kit/ch1/1.2/k8s-min-5GiB/master_node.sh - In this master node, for example, you can use
klikekubectl
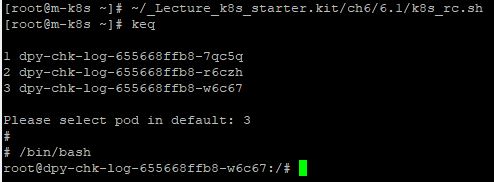
- Now, we will use keq as
kubectl exec [Your Pod Number]. - You can see the code with
cat ~/_Lecture_k8s_starter.kit/ch6/6.1/k8s_rc.sh

- To run this file, enter ` ~/_Lecture_k8s_starter.kit/ch6/6.1/k8s_rc.sh`.
- When you type
keq, you can see the selection. - The default command line environment is shell, but if you want, you can change to bash with
/bin/bash.
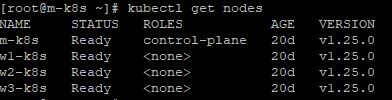
Upgrade
- Before upgrading, our master node version is 1.25.0.
Master node
- To upgrade your kubernetes, you should upgrade kubeadm with
yum upgrade kubeadm-[Your Upgrade Version] -y, cluster withkubeadm upgrade apply [Your Upgrade Version] -y, kubelet withyum upgrade kubelet-[Your Upgrade Version] -y. - Now, you need to restart kubelet with
systemctl restart kubeletandsystemctl daemon-reload.
Worker node
- In worker node, you should upgrade kubeadm with
yum upgrade kubeadm-[Your Upgrade Version] -y, cluster withkubeadm upgrade node, kubelet withyum upgrade kubelet-[Your Upgrade Version] -y - When you have different cluster between master node and worker node, you can use
kubeadm upgrade nodeandkubectl -n kube-system get cm kubeadm-config -o yaml.

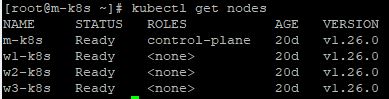
- Now, you need to restart kubelet with
systemctl restart kubeletandsystemctl daemon-reload. - You can see upgrade result in master node with
kubectl get nodes.
Automatic Upgrade with Ansible
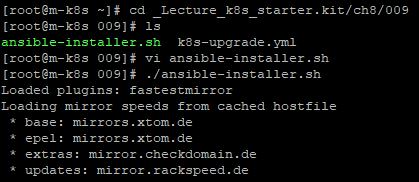
- You can check the installer code for ansible with
cd _Lecture_k8s_starter.kit/ch8/009andvi ansible-installer.sh yum install ansible-2.9.27-1.el7 -ywill install ansible.cat <<EOF > /etc/ansible/hosts [Master] 192.168.1.10 [Workers] 192.168.1.[101:103] EOFdescribes upgrading hosts.known_hostmakes automatic authorization in ssh without password.
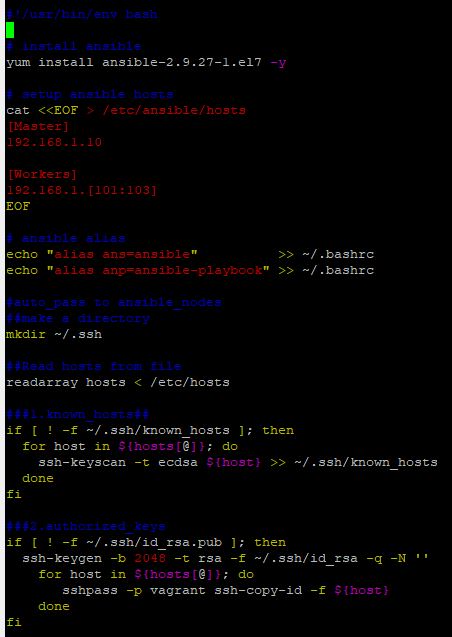
- You should run this file with
./ansible-installer.sh,
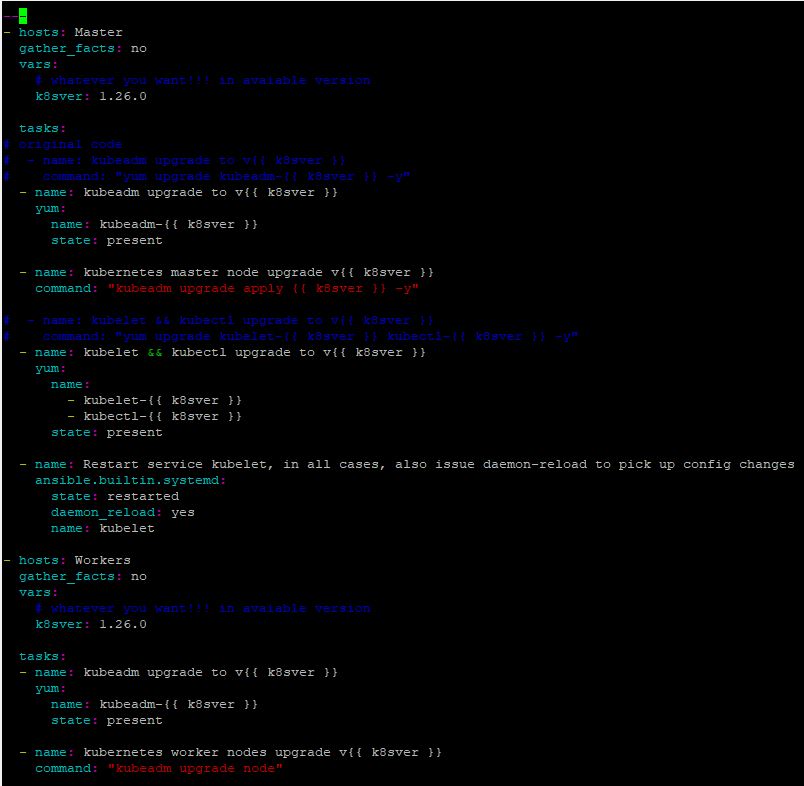
- There is an upgrade yaml code and you can check this with
vi k8s-upgrade.yml. hostsmeans host for upgrading.- In task, you can see
yumand this describes we want to upgrade kubeadm, cluster and kubelet. ansible.builtin.systemdshows, we want to restart our kubelet and reload daemon.
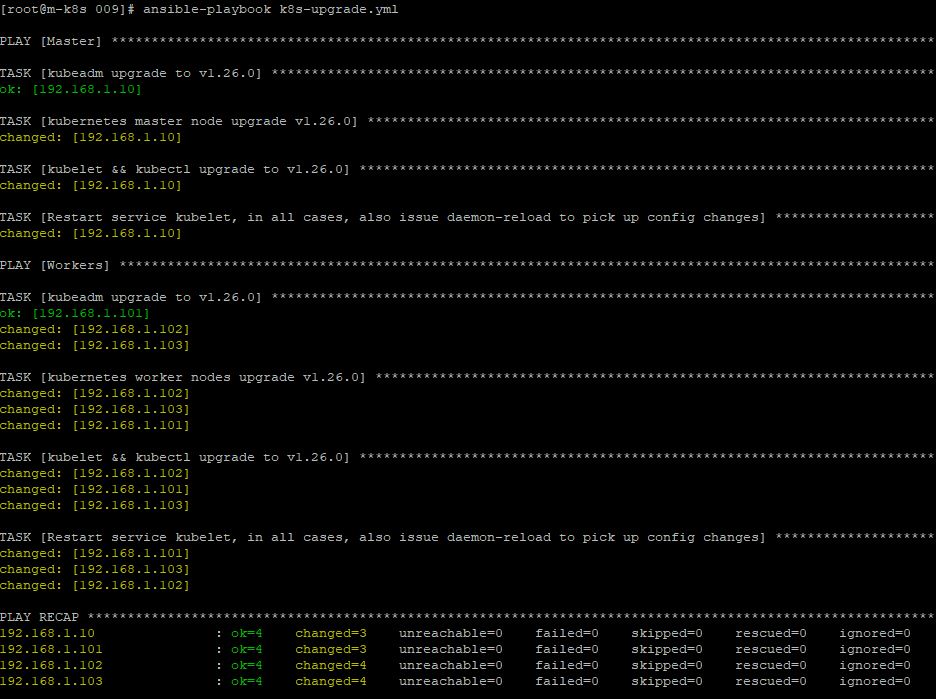
- After you check your upgrade version, run this upgrade code with
ansible-playbook k8s-upgrade.yml.
DNS
- Reference : Kubernetes DNS Query
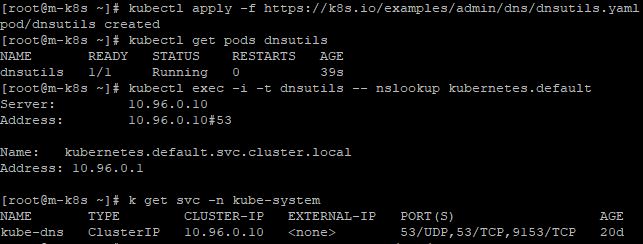
- Use that manifest to create a Pod with
kubectl apply -f https://k8s.io/examples/admin/dns/dnsutils.yaml.
- Take a look inside the resolv.conf file with
kubectl exec -ti dnsutils -- cat /etc/resolv.conf

- Use the kubectl get pods command to verify that the DNS pod is running with
kubectl get pods --namespace=kube-system -l k8s-app=kube-dns. - The command line will show pods, that their label is kube-dns and they are belong to namespace kube-system.

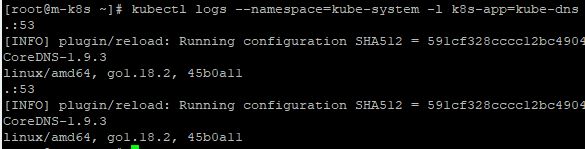
- Use the kubectl logs command to see logs for the DNS containers with
kubectl logs --namespace=kube-system -l k8s-app=kube-dns.
etcd
- In mater node, there is Api server and etcd.
- etcd communicates with Api server for cluster status.
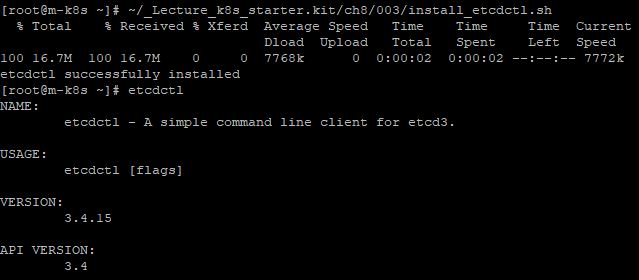
- You can install etcd with
~/_Lecture_k8s_starter.kit/ch8/003/install_etcdctl.sh.
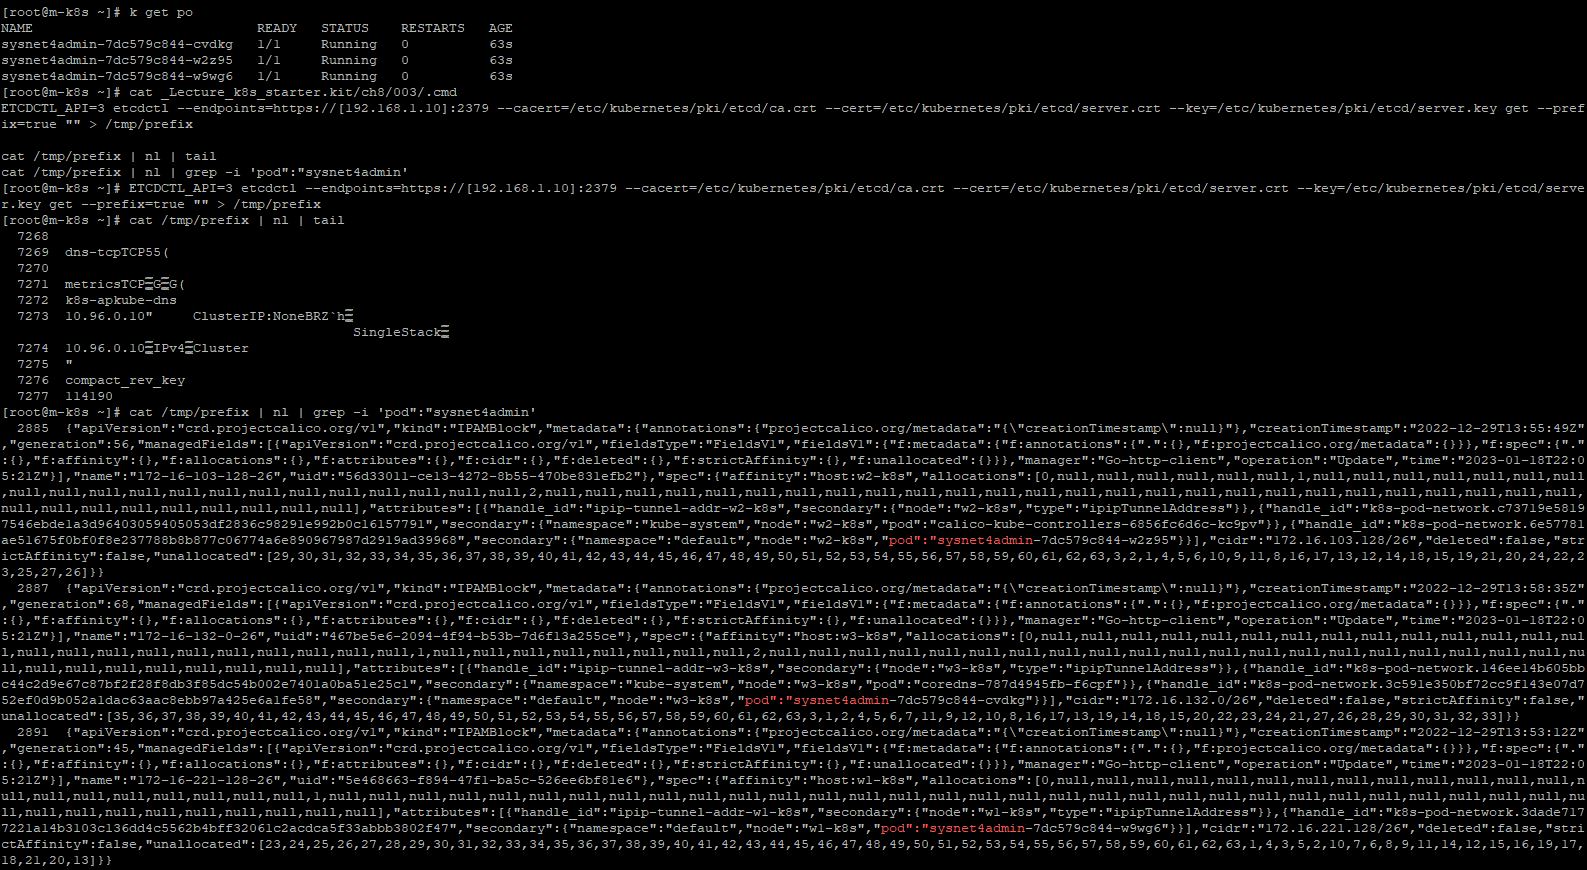
- Create deployments with
k apply -f _Lecture_k8s_starter.kit/ch8/003/sysnet4admin.yaml - Sync Api server and etcd with
ETCDCTL_API=3 etcdctl --endpoints=https://[192.168.1.10]:2379 --cacert=/etc/kubernetes/pki/etcd/ca.crt --cert=/etc/kubernetes/pki/etcd/server.crt --key=/etc/kubernetes/pki/etcd/server.key get --prefix=true "" > /tmp/prefix - Then you can see two command line,
cat /tmp/prefix | nl | tailandcat /tmp/prefix | nl | grep -i 'pod":"sysnet4admin'
- When you scaled deployments, you should sync again.
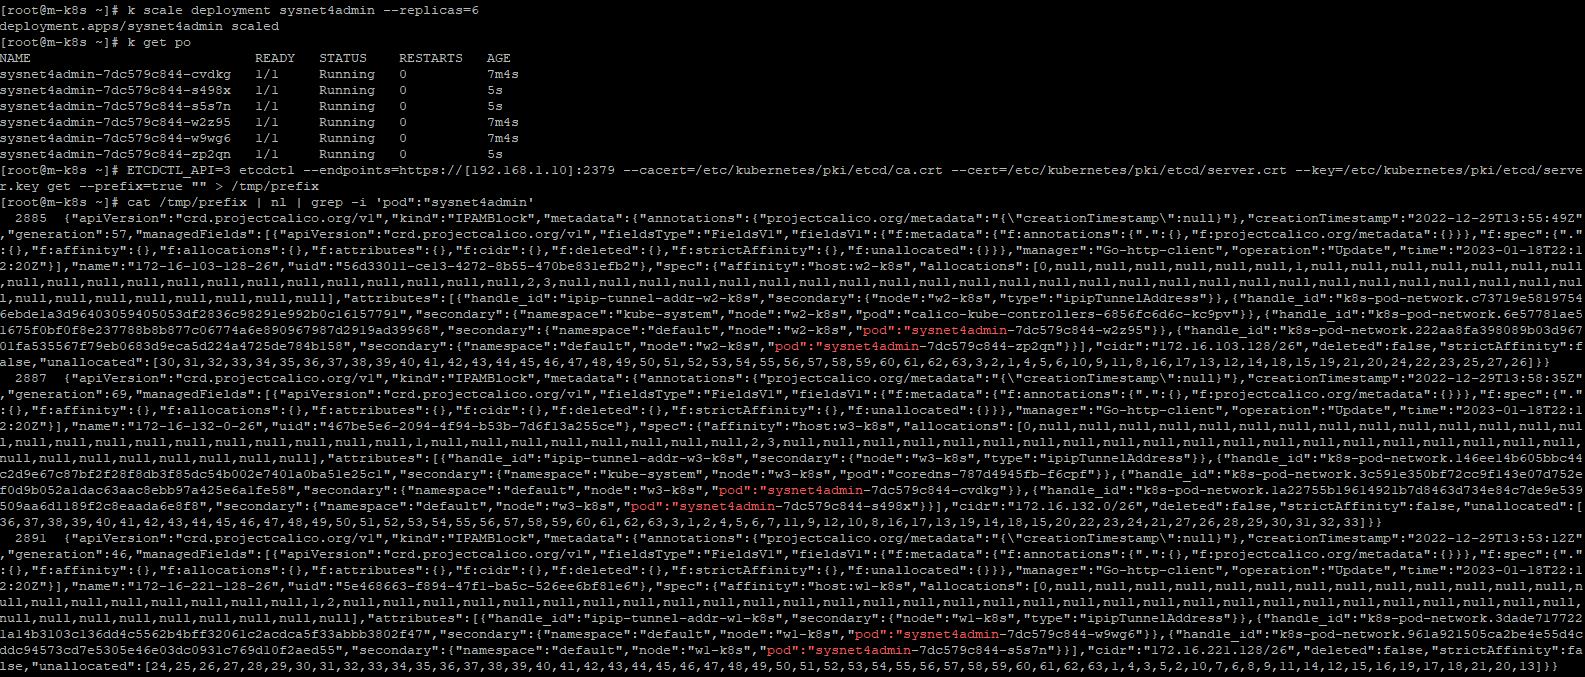
- When you delete deployments, you should sync again, too.

Application
- Every application use a specific namespace, because it’s easier to delete.
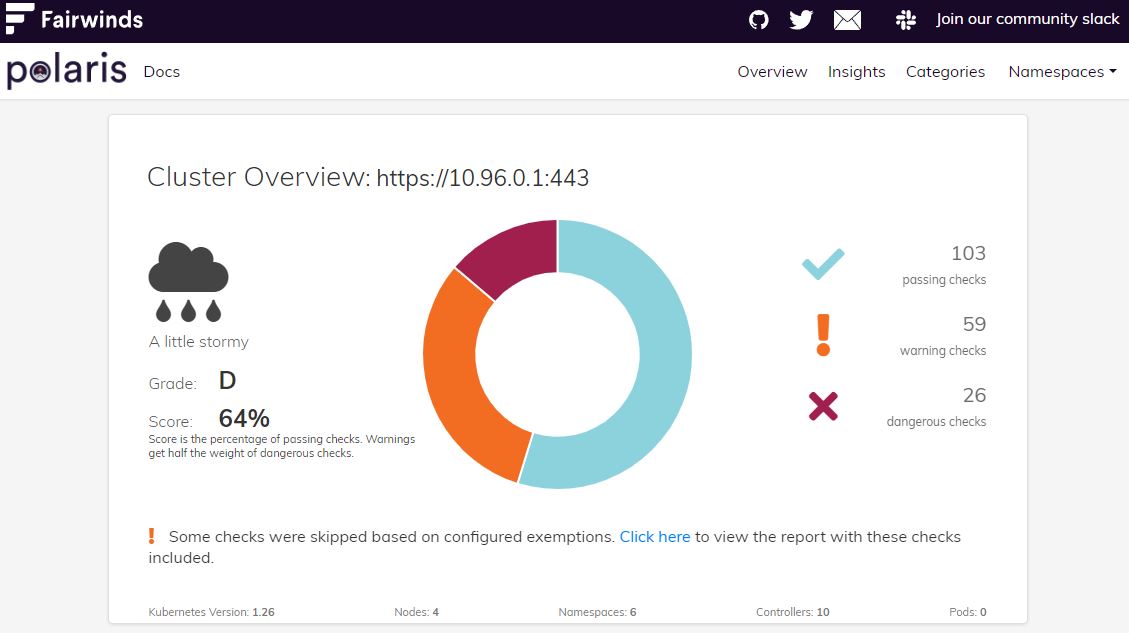
Polaris
- Reference : Fairwinds
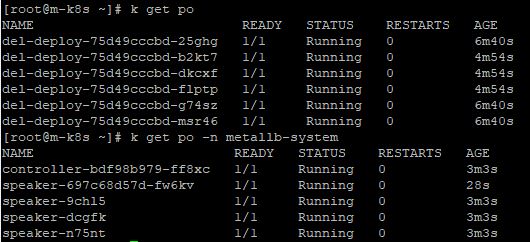
- Before practice, you need 6 normal deployments and 1 specific deployment, which belong to metallb-system namespace.
- Then, you need to download helm in your repository with belows.
curl -fsSL -o get_helm.sh https://raw.githubusercontent.com/helm/helm/master/scripts/get-helm-3
chmod 700 get_helm.sh
./get_helm.sh
- Now, you can download polaris with belows.
helm repo add fairwinds-stable https://charts.fairwinds.com/stable
helm upgrade --install polaris fairwinds-stable/polaris --namespace polaris --create-namespace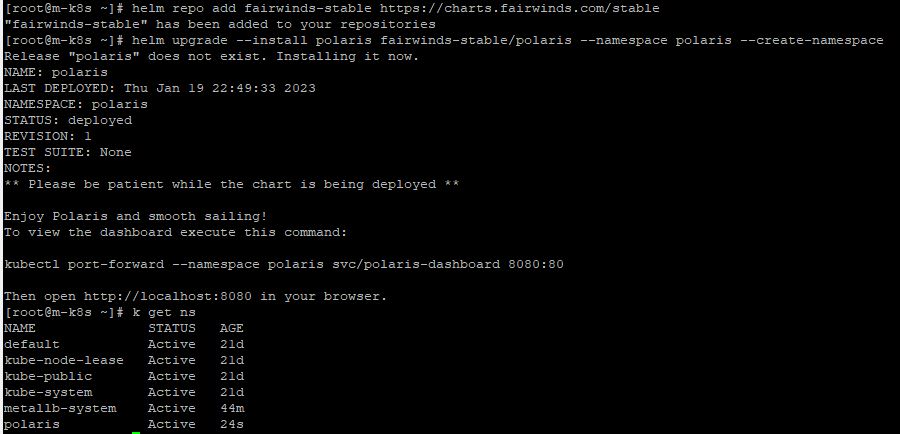
- Finally, you will expose polaris dashboard with LoadBalancer in port 8080 with
k expose -n polaris deployment polaris-dashboard --type=LoadBalancer --name=polaris --port=8080.

- Use
http://192.168.1.11:8080/in your web browser to see your dashboard.
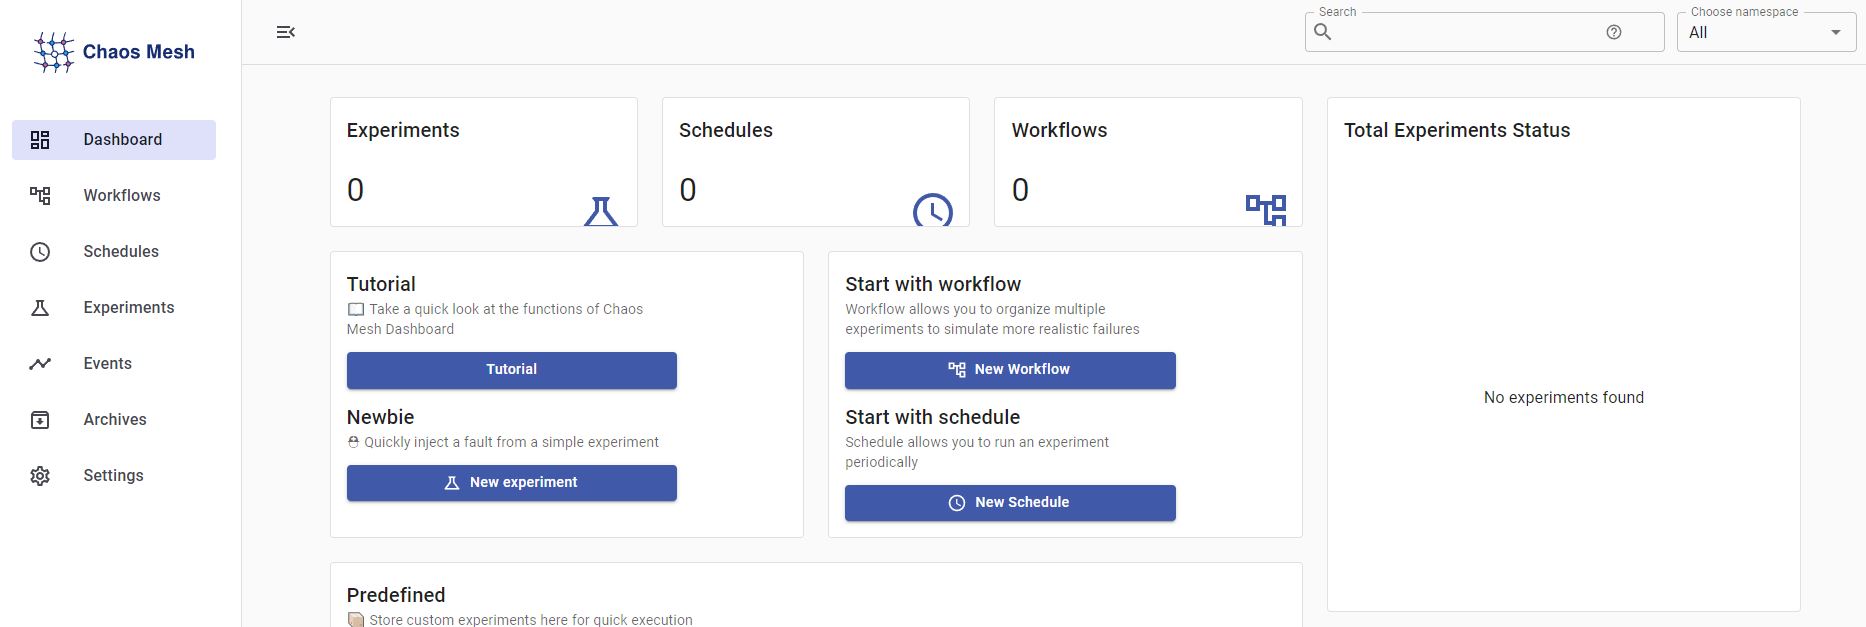
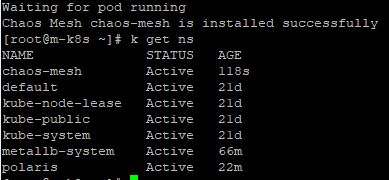
Chaos Mesh
- Reference : Chaos Mesh
- Download with
curl -sSL https://mirrors.chaos-mesh.org/v2.5.1/install.sh | bash.
- Use
k get svc -n chaos-meshto check your node port number.

- And you can access Chaos Mesh dashboard in your web browser on
[One of Your Node IP]:[Chaos Mesh Node Port] - Chaos Mesh is used as a lab with experiment tab.